

7 Ways To Modernise The Look Of Your Home
Is your home feeling drab and dated? Discover easy tips to bring your property into the present day including if you’re on a budget with WoodWall.
The ORIGINAL WoodWall™ Supplier
The Original WoodWall™ Supplier
FREE Shipping on all Orders
When you purchase ready made wall panels, the process of panelling a wall is quite straightforward. That’s because you’ll only need to measure, cut and drill the pre-existing panels, rather than having to create all of the slats or panel work from scratch.
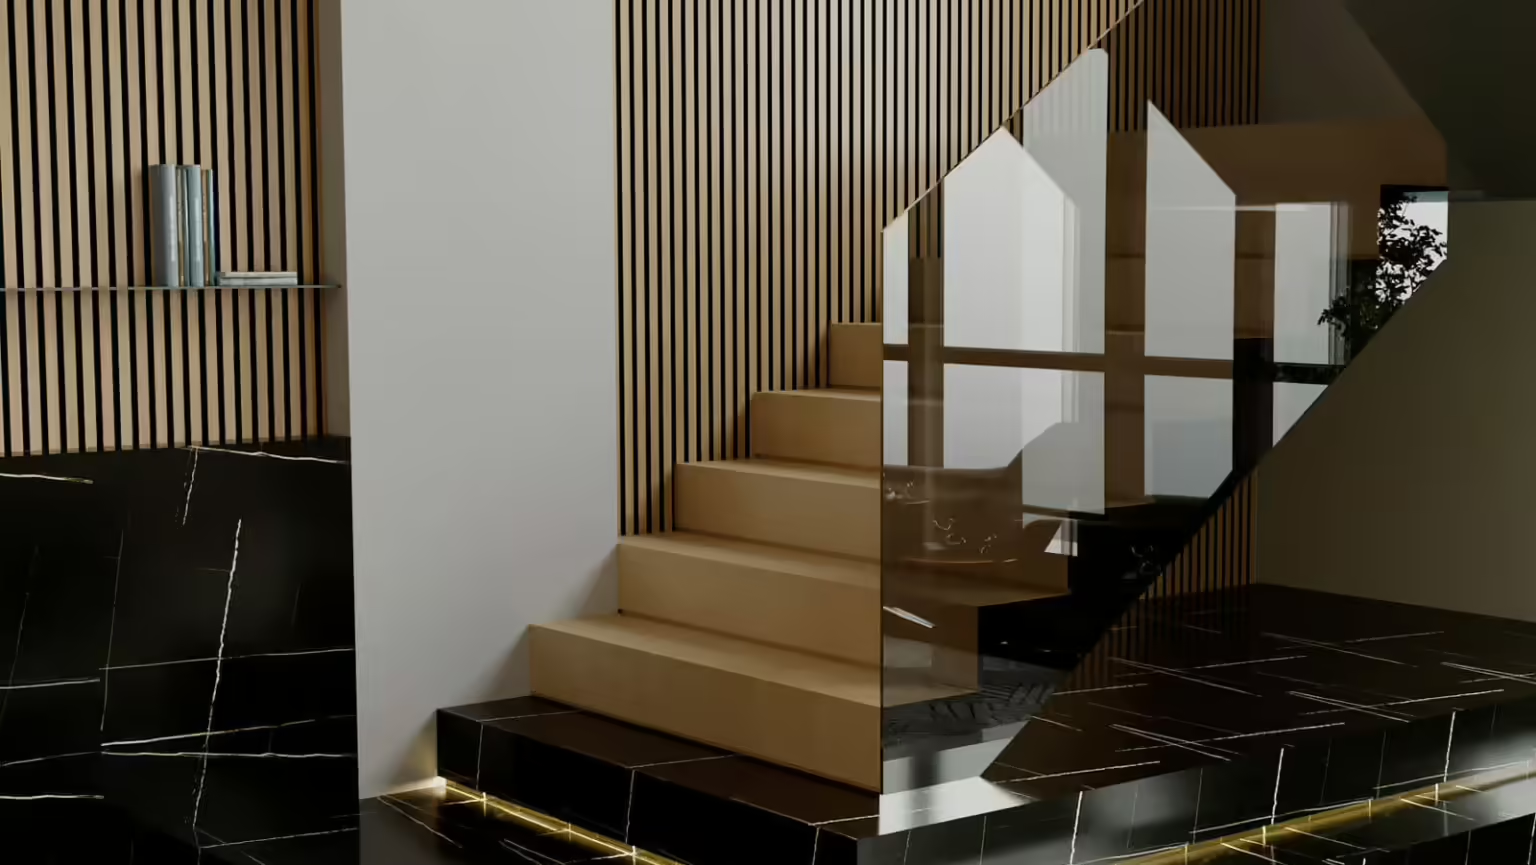
All wall panels are different, so in this post, we’ll be focusing on the acoustic wood wall slat panelling that we sell here at WoodWall.
The following instructions will tell you what you need, plus what’s involved when you want to learn how to panel a wall.
Measuring the walls is essential to calculate how many panels you’ll need along with where to make cuts in the panels. Accurate measurements can also preempt any potential issues in achieving a clean design.
Start by grabbing your tape measure to calculate the width and height of your walls compared with the size of the panels you’ve either bought or plan to purchase.
If you are buying your wall panels here at WoodWall, our panels measure 2400mm x 600mm.
You can decide to only cover part of a wall to add visual interest and improve the acoustics of the room. Alternatively, a very popular look is to cover the entire surface of the wall with wood panelling. So make sure you measure accordingly.
Don’t worry if your wall is taller or wider than the panel sizes, as acoustic wall panels are made with interlocking gaps providing an equal size gap between all the panels. This allows you to easily cut the panels to fill any gaps to achieve a seamless finish.
However, one thing you will need to decide when measuring is whether you will be removing the skirting board to cover the entire wall, or working from the skirting board and up to the ceiling.
Before you install a single wall panel, you also need to check whether your walls are level using a spirit level. If they are out of plumb, there are a couple of easy ways to disguise this to achieve a clean finish but this will only be possible if you check beforehand.
As the wood panels sit on a black frame, you can actually run some black paint down the side of the wall where there is a slight gap, especially if the wall is only out at the top or bottom by just a couple of millimetres. Do this before you install the panel.
Alternatively, you can purposely cut the end of the panel at the felt end so that it fits snugly in the gap, ensuring that the wall colour behind the panels won’t be visible.
Assuming you’re opting for a full wall design, it’s often recommended to start in the centre of the wall to ensure equal cuts on either end of the wall.
Measure where the panels will go working from the centre outwards and mark their placement on the wall using a pen. It’s extremely useful to do a dry run of the design by laying each panel out on the floor before you actually drill them into the walls. This allows you to check if any adjustments are needed based on how the panels interlock together.
When you are happy with your measurements, you will need to double check you won’t hit any pipes or cabling by using a detector. Do this before drilling to ensure it is safe to go through the plasterwork.
Line up your centre panel with the markings you’ve made, and take a final opportunity to ensure it’s level using a spirit level. Take your pen and make a couple of marks on either side of the panel.
Put the panel down, and using the spirit level, draw 5 horizontal lines across the wall to give you a reference point for where you will drill into the wall, so that every panel can be drilled evenly. As a general rule, wall panels typically require 15 individual screws.
You’ll first be drilling 3 individual pilot holes across each line. Place the panel over the centre markings, and look at your horizontal lines as you begin to drill into the panels.
Remove the panel again and draw a small cross on each pilot hole. Use a 6mm masonry drill bit to drill through the plaster. Install 6mm plugs into the holes. Push the plugs into the wall as far as they will go and gently tap over each plug with a hammer.
Put the panel back into position and drive the 15 screws into the wall so that the panel is securely attached to the wall.
With the centre wall panel in place and the rest of the wall marked out, installing the additional wall panels is going to be quite straightforward.
The only thing you’ll need to do differently is cut out sections to fit around any plug sockets. Again, this is simply a case of measuring where the gap is and using a saw to cut out the panel to offer a snug fit around the socket.
Finally, you will need to take care when installing the end panels to ensure the panels butt up properly against the wall. You must factor in any spacing created by the felt. If you measured the top and bottom of the walls at the start, you’ll know if the felt needs adjusting slightly with a Stanley knife to account for any section of the wall being out of plumb.
Depending on the height of your wall, there may be a gap between where the panels end and the ceiling.
Don’t panic! It is very straightforward to fill the gaps, especially as the slat spacing will be exactly the same as what you’ve already installed below.
If you cut the boards horizontally, the individual slats may move out of place because the pins holding the boards down the length have also been removed. This can easily be fixed by using a slat offcut to place in between each slat to establish the correct spacing. You can then fix the loose slat into place using some adhesive.
Any panels to plug your gap can also be fixed to the wall using adhesive, making for a seamless finish. Just be sure to line each panel up carefully before moving on to the next panel so that it will set into place correctly.
Now you know how to panel a wall, all that’s left to do is order your wood panels if you haven’t already!
At WoodWall, we specialise in contemporary wall panelling that features distinctive wooden slats. Available in four stunning colour options, your chosen wall panels will be with you 48 hours after you place your order through our UK nationwide delivery service.
Head over to our online store to browse our wall panels and make your purchase.
Have any questions about our acoustic wooden panels? Please give us a call on 01925 640573 or fill out our contact form.
Is your home feeling drab and dated? Discover easy tips to bring your property into the present day including if you’re on a budget with WoodWall.
Boasting improved acoustics and stunning visual appeal, discover 15 ways acoustic wall panels with slats can be used in your home or business.