

7 Ways To Modernise The Look Of Your Home
Is your home feeling drab and dated? Discover easy tips to bring your property into the present day including if you’re on a budget with WoodWall.
The ORIGINAL WoodWall™ Supplier
The Original WoodWall™ Supplier
FREE Shipping on all Orders
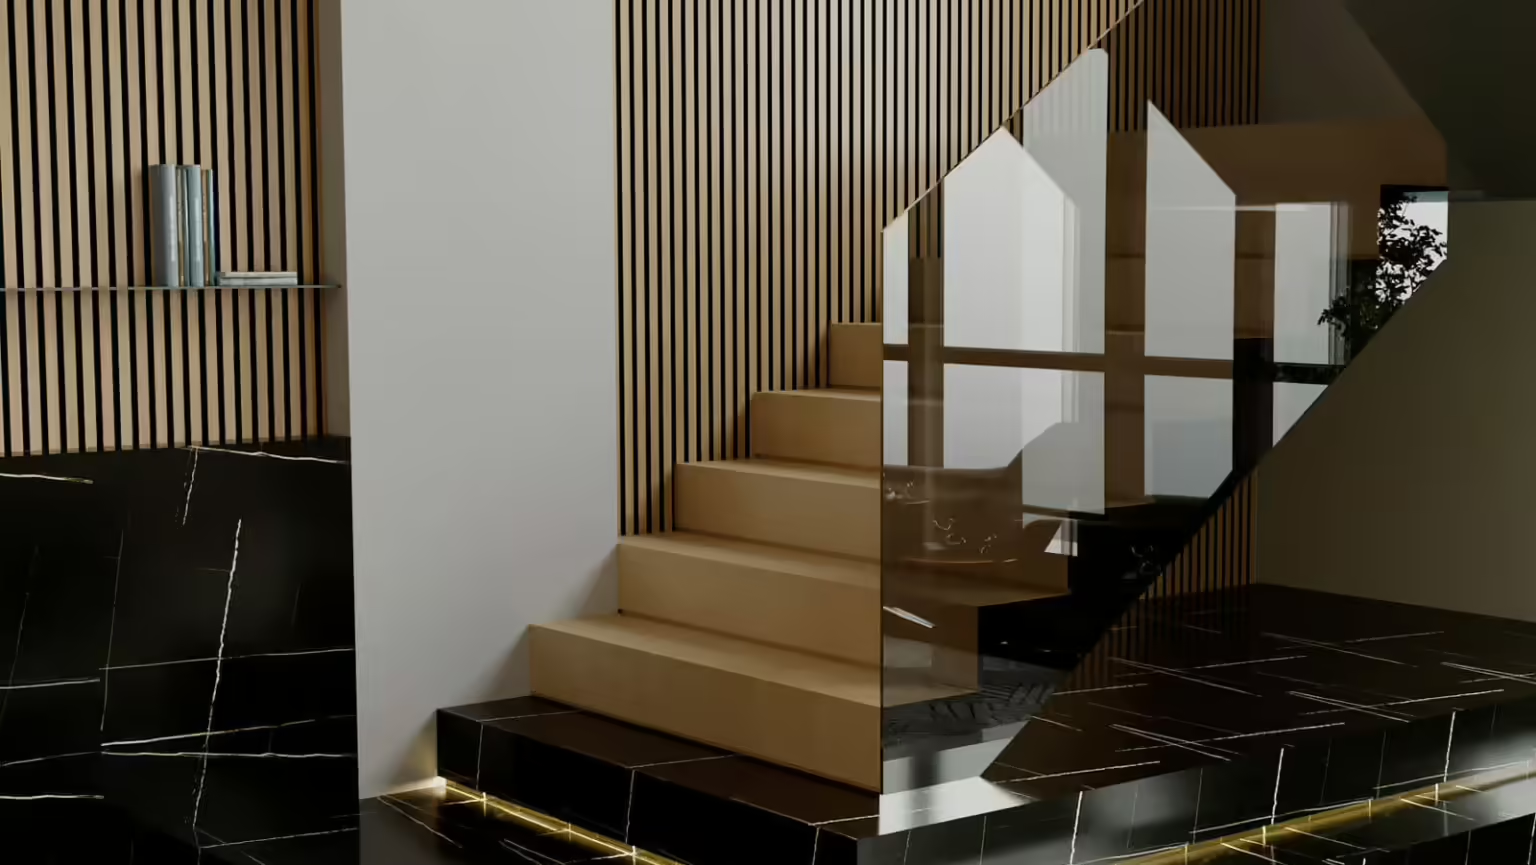
Capable of making an instant improvement to the look of your home or commercial environment—wall panels continue to take the interior design world by storm.
If you are keen to learn how to install wall panels, the steps involved and overall ease will depend on the wall panel type.
At WoodWall, our speciality is acoustic wood slat wall panels, so this is what our installation advice will focus on.
In particular, acoustic wood slat panels can be installed in a matter of minutes by competent DIYers, making them much more user-friendly than traditional wall panels. So you might wish to opt for them instead if you want to complete the job easily, rather than having to construct your panels from scratch!
In addition to watching video tutorials, here are some of the steps and hints to consider for a successful wall panel installation.
The benefit of acoustic wood slat panels being a contemporary wall panel type is that they have been engineered to not only offer superior performance, but also be easier to install than other types of wall panels.
It’s important to familiarise yourself with the design of a wood slat wall panel before you begin. Acoustic wall panels have slim vertical slats running from end to end and sit on a thick material backing.
This material backing can also be useful to plug gaps along the wall edges, if the wall is slightly out of plumb by a few millimetres at the top or bottom. Custom cuts of the material can be achieved by using a Stanley knife. Replace the panel on the wall and it should then offer a perfect fit for the wall.
Finally, another handy note is that the wooden slats can be detached by turning the boards over and removing the clip holding them in place. You may need to do this to prevent having to cut through a slat depending on where your wall ends to ensure a neat looking finish.
P.S. Yet to purchase your panels? Head over to the WoodWall store to purchase our Acoustic Wood Wall Slat Panelling 🛒
Before the installation, you need to check a couple of details to ensure a professional result.
You will first need to measure your walls to be able to order the right amount of panels.
If you’re ordering your acoustic panels from WoodWall, our panels measure 2400mm (height) x 600mm (width).
While you have a measuring tape and spirit level handy, also check the following:
Now is also a good time to look if your chosen wall presents any potential obstacles. For instance, plug sockets that may need cutting around or similar tricky zones.
The great thing about acoustic wall panels is that they offer a degree of flexibility for awkward wall shapes or unusual features. However, you could potentially move your installation to another wall if you don’t want to bother with making custom cuts of the panels. So decide all of the above now!
Once your panels have been ordered and delivered, you can then get to work.
To make the installation as easy as possible, start with a dry run. This involves cutting all of your panels to size (including any custom cuts) and laying them on the floor. The purpose is to ensure all of your measurements, panel fits and cutting angles are correct before the panels are installed on the walls.
Plan to install your first wood slat wall panel in the centre of the wall and work outwards.
Go along each panel until you have your design complete lying on the floor.
Psst: Although this is the ‘dry run’ stage you can still have a break for a cup of tea!
Place your centre board back into position and grab a marker pen. You will need to draw 5 level lines across the wall using a spirit level to guide you.
Each board will require 15 individual screws.
Use a 6mm masonry drill bit to drill 3 evenly spaced pilot holes across each of the 5 lines. This will give you a guide for where your 15 screws will go.
Finish by gently tapping each plug with a hammer.
Place your centre panel back into position and use a cordless screwdriver to drive 15 screws through the material section of the panels and into the plugs you’ve just drilled. Opt for a black coloured screws so that the screws will not be visible against the black material.
After all 15 screws are in, the panel should now be securely attached to the wall.
Repeat the same for all your panels working from the centre out. Having checked the spacing and fit during the dry run, your panels should offer exactly the same look and fit once attached to the walls.
If you need to make any cuts around plug sockets you ideally should have cut these during the dry run. Otherwise, make sure you make these cuts now so that the boards will snugly fit into place.
Depending on the height of your wall, you may have some gaps above your wall panels that need to be filled.
During the dry run, you will have also identified any potential gaps so this shouldn’t come as a surprise!
To fill the gaps, you will need to use any additional panels you have ordered so that these can be cut to size.
When you cut an acoustic wall panel horizontally, the pins holding the slats into place may be lost meaning the remaining slats may move out of position. These can easily be secured back onto using some adhesive. Placing a slat offcut in between each slat will provide the correct spacing before glueing the slats into place.
Once the slats are dry, place adhesive onto the back of the material and position the offcut into place on the wall. Ensure the slats are perfectly lined up. Continue along the wall until all the gaps are filled.
Et voila!
Installing any kind of wall panelling can seem daunting at first. However, by taking the time to understand the nuances of the panel type the process will soon become familiar.
As noted above, you can also check out our acoustic panel installation guide for specific guidance on installing WoodWall panels.
If you need any further help or assistance with WoodWall products, please get in touch with our customer care team. You can also order our acoustic slat wall panels through our website.
Is your home feeling drab and dated? Discover easy tips to bring your property into the present day including if you’re on a budget with WoodWall.
Boasting improved acoustics and stunning visual appeal, discover 15 ways acoustic wall panels with slats can be used in your home or business.